So I finally got around to making this leotard.
Supplies:
- your fabric (It should be stretchy)
- Scissors or a rotary cutter (I use both)
- pins and pin cushion
- your pattern (you can make your own but I bought one)
- Sewing machine
- Thread to match your fabric
- Seam ripper *optional but recommended
- washers *optional but recommended
- cutting mat if you are using a rotary cutter
Here are my washers and pins and scissors. I have two pairs of scissors because they get dull really fast around my house and I always have to test and see which ones will work without making my fabric look icky.
So here are my pattern pieces that I have traced out on to freezer paper. I recommend that you always trace your patterns out on freezer paper because as the kid grows you will need a different size and this way you will not have to spend another $2o on a pattern.
Here is a needle book that I keep my "special" needles in, for this type of fabric I used a ballpoint needle. Apparently any type of stretchy fabric you need to use a ballpoint needle. I guess you learn something everyday.
Here is my thread and fabric you want to get your colors as close as possible, you will not really see the inside seams however when you are doing the elastic you will see the thread.
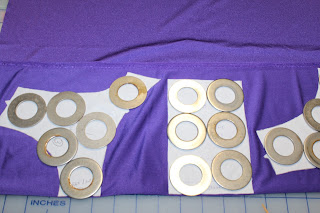
Now you have to cut out all your fabric out. I lay the pattern down and put the washers on it so that my pattern doesn't move around and I think it gives me a closer cut, however that may just be me going crazy.
It is easier for me to just lay all my pieces out at once just to see what will use the least amount of fabric. But overall it is just what is easier for you in the space you have.
Here is my front body piece cut.
I like to lay everything out like it will be sewed together in order to make sure that it all looks right, it just helps me organize myself a little bit.
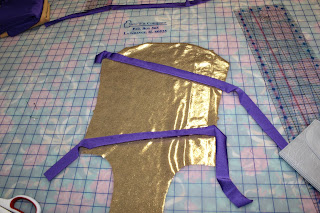
I put three applique strips on this one and I had to lay them out first to make sure i liked their placement.
when I do the applique I baste stitch it on then i use a tiny zigzag on the edges to make sure it won't rip off. when you do these stitches make sure your fabric and thread colors are matching.
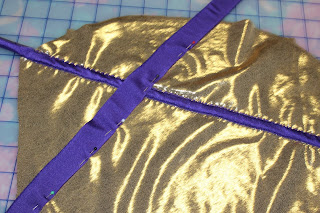
Now I am putting my third strip on. i recommend that you pin it first sew then flip it over so you are hiding those unfinished edges of the fabric.

Here is a close up of my stitching with the straight and then small zigzag
Now that you got the body mainly done you need to put the top together. If you have a one piece pattern then you won't need to do this part.
A close up of pinning. I recommend you alway alway ALWAYS pin then sew because this stretchy fabric moves around and slips around A LOT! ! ! ! !
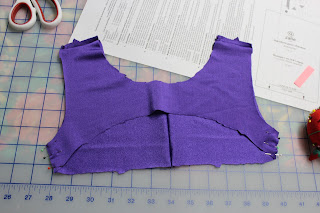
Here is it after sewn together, this is the top back piece.
Now you pin your shoulders together and sew.
Here is both shoulders pinned.
Now match the sides up and sew.
Match the sides and crotch of your leotard up and sew then you will have the body and top pieces of the leotard done.
Then you match the little points up on your pattern and sew all the way around the leotard. This step is much easier said than done.
As you go you should always serge your edges or do a straight stitch then a zigzag to imitate a somewhat serge.
This is the pattern i used.
Finished outside front
Finished outside back.
And as usual I signed my work.
If you have any questions please feel free to ask, if you have any suggestions pretty please share those too because we would all love to hear.
XOXO,
Erin Lou


how long did it take ??
ReplyDeleteI sew my own gymnastics leotards ( only 15) and they usually take me around 2.5 hours (on a "good day") to make because you have to be very precise when making them for the leo's to look good, not only on the outside, but also on the inside.
DeleteWhat type of material did you use.
DeleteI think it took 1h hour because that's alot of work
ReplyDeletehow to put your signature?
ReplyDeleteHow do you do the elastic around the legs and stuff?
ReplyDeleteHow do you finish the crotch part so that its comfortable for wearing?
ReplyDeleteWhat pattern did you use?
ReplyDeleteI would like to see more about the elastic and the fine finishing details. I can get as far as the blog post on my own. It's the fine details that are hanging me up.
ReplyDeleteI guess I am missing how you attached the yoke to the bodice. The curves get me.
ReplyDelete